


One of the most common questions that we get here at Poorhouse Quilt Designs is:
- Which Fusible Foam should I use?
- How do you fuse with foam?
Foam stabilizer is used when you need structure for your finished project. Bags are a great example! You will want your bag to hold it’s shape over time. The foam is also thicker than other stabilizer products, so it can cushion as well.
Let’s start with what I use - I prefer Bosal Foam and Fiber’s In-R-Form products. There are other foam stabilizers out there, this post will address Bosal products, but you might also find info you can apply to the others. Bosal has 3 types of foam stabilizers: Sew In, Single Sided Fusible Foam and Double Sided Fusible Foam - which should I use?

It helps to know the features of each type of foam. Sew-In is what it sounds like - there is no fusible adhesive applied to it. Bosal Sew-In In-R-Form has a layer of “spun lace” (feels like a flannel) on both sides of the foam which allows the foam to grab the fabric. This product is great for projects that will be quilted or that you don’t want to fuse. We use the Sew In Foam for our Dry Ideas pattern.
What if you actually needed Fusible Foam, but bought Sew-In? No worries! Either apply a temporary basting spray (we like 505) of fusible web according manufacturer’s instructions!
Tip - If you are working on a project that would benefit from quilting on one side, use a frixion pen to draw the quilt lines on and stitch from the back.

Single Sided Fusible In-R-Form features one fusible side and one side with spun lace. Let's say you have a tote bag pattern with a lining that is attached around the top and it is "loose". Single sided fusible is perfect here - the spun lace will grab the lining and hold it inside the tote for you. I generally fuse the fashion fabric to the outside and do some fun walking foot quilting.
How can I tell which one I have? Spun lace looks and feels like a soft flannel. The adhesive side appears somewhat shiny and will be noticeably harder to the touch. That will go away when you fuse it - the fabric and the adhesive bond as the glue melts into the fabric.

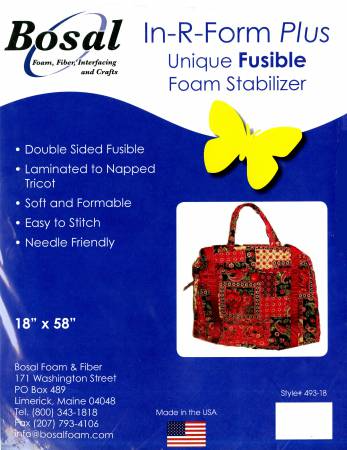
Double Sided Fusible In-R-Form Plus features two fusible sides. This product is used when you want to quickly assemble the project and you don’t mind binding the edges. Tip - you might want to use a teflon sheet or parchment to protect your ironing surface when you are fusing the first side. We love using Double Sided Fusible for our placemat projects, like Scalloped Mats!
Tip: Flower Head pins or Wonder Clips are great for holding foam projects together!
Bottom line: Which foam stabilizer you pick depends on the construction method for the project. The pattern designer will generally tell you what type to use on the pattern. It helps to know what type is used where, in case you want to try something different!
How to fuse foam with success?
- Determine which side of your foam is fusible. (Remember, you are looking for the shiny side of the foam).
- Position your fabric over foam (wrong side of fabric to the fusible side of the foam).
- Smooth out any wrinkles.
- Lightly mist the fabric with plain water. Just a fine mist is needed!
- Fuse with a Medium Hot iron, from the right side of the fabric - you can use a press cloth if you want.
- Fuse until the fabric is dry and test the bond by pulling at the edge of the fabric.

Done!
Don’t be afraid to work with different foams - we love the quilted texture that you can get with foam!
Whether you need an interfacing, fusible foam, or fusible web, you can correctly choose which one you need and learn how to best use it with this resourceful pocket-sized book, Guide to Interfacings - written by yours truly! Ask for it at your local quilt shop or you can purchase it here.

Have fun stitching!
Kris
